
How To Replace an Electrical Panel? Complete Breaker Box Upgrade
Your electrical panel is the control center of your entire home. It distributes power to every outlet, appliance, HVAC system, and lighting circuit. But when an outdated or overloaded breaker box fails, it can pose serious safety risks, including power loss, overheating, damaged appliances, and even electrical fires.
Knowing how electrical panel replacement works helps homeowners understand when upgrades are necessary, what the process involves, how much it costs, and why professional electric panel installation matters, especially in older Dallas-Fort Worth homes dealing with rising energy demands.
In this complete guide, we’ll cover:
- What an electrical panel does
- Signs you need a breaker box upgrade
- How to replace an electrical panel step-by-step
- Electrical panel replacement costs in Dallas
- Permit and code requirements
- Common mistakes homeowners make
What Is an Electrical Panel?
An electrical panel, also called a breaker box, breaker panel, fuse box, or service panel, is the main distribution hub for electricity inside your home. Power from the utility company enters the main service panel and is safely distributed to individual circuits throughout the property.
Modern electrical panels contain:
- Main breaker
- Circuit breakers
- Neutral bus bars
- Grounding system
- Service disconnect
- Branch circuits
Older homes in Dallas often still use outdated fuse boxes or undersized 100-amp panels that struggle to support today’s electrical demands from:
- Central air conditioning systems
- EV chargers
- Tankless water heaters
- Smart home systems
- Home offices
- Large kitchen appliances
- Backup generators
When your electrical demand exceeds your panel capacity, the system becomes unsafe and unreliable.
Why Homeowners Replace Electrical Panels
Electrical panels are not designed to last forever. Most panels typically last between 25 to 40 years, depending on:
- Installation quality
- Electrical load
- Environmental conditions
- Maintenance history
- Manufacturer defects
As experienced electricians at Astar DFW often see across Dallas-Fort Worth, aging panels become one of the most overlooked electrical hazards in residential properties.
Common Reasons for an Electrical Panel Upgrade
Frequent Breaker Trips
If breakers constantly trip, your panel may be overloaded or failing internally.
Flickering Lights
Voltage instability caused by outdated breakers or loose connections often causes lighting fluctuations.
Burning Smell Near Panel
This may indicate overheated wires, melted insulation, or arcing.
Rust or Corrosion
Moisture damage inside a breaker box creates dangerous electrical conditions.
Adding High-Powered Appliances
Installing:
- HVAC systems
- EV chargers
- Hot tubs
- Electric ovens
- Solar systems
often requires a higher-capacity electrical panel.
Insurance Issues
Some insurance companies refuse coverage for outdated electrical panels like:
- Federal Pacific
- Zinsco
- Challenger
because of known fire hazards.
Home Renovation or Addition
Kitchen remodels, garage conversions, or room additions frequently require service upgrades.
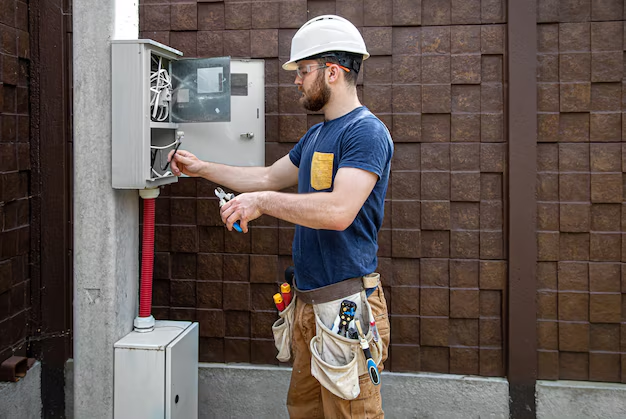
How To Replace an Electrical Panel?
Below is a complete step-by-step guide explaining how an electrical panel replacement is typically performed from start to finish.
Tools and Materials Needed To Replace an Electrical Panel
Before replacing an electrical panel, gather all necessary tools, safety equipment, and materials. Having everything prepared beforehand helps make the installation process smoother and safer.
Basic Electrical Tools
- Insulated screwdrivers
- Phillips and flathead screwdrivers
- Wire strippers
- Cable cutters
- Needle-nose pliers
- Lineman pliers
- Utility knife
- Hammer drill
- Flashlight or work light
- Label maker or masking tape
- Permanent marker
- Level
- Fish tape
Electrical Testing Tools
- Voltage tester
- Non-contact voltage tester
- Multimeter
Safety Equipment
- Safety glasses
- Insulated gloves
- Rubber-soled shoes
- Flashlight
- Fire extinguisher
Materials Needed
- New electrical panel
- New circuit breakers
- Ground bar kit
- Electrical connectors
- Cable clamps
- Grounding wire
- Ground rods
- Mounting screws
- Wire nuts
- Electrical tape
- Whole-home surge protector (optional but recommended)
Step 1: Determine the Correct Electrical Panel Size
Before replacing the breaker box, determine how much electrical power your home actually needs. Installing the wrong size panel can cause overload problems later.
Check Your Home’s Electrical Demand
Think about all major appliances and systems your home uses, including:
- Air conditioner
- Furnace
- Electric water heater
- Refrigerator
- Electric range
- Washer and dryer
- EV charger
- Pool equipment
- Smart home systems
Common Residential Panel Sizes
Most homes use:
- 100-amp panels for small or older homes
- 150 amp panels for mid-sized homes
- 200 amp panels for modern homes
- 400 amp service for large luxury homes
In many Dallas-Fort Worth homes, 200-amp panels are now the most common upgrade because modern HVAC systems and appliances use much more electricity than older homes were originally designed for.
Step 2: Get Electrical Permits and Schedule Utility Disconnect
Most cities require permits before replacing an electrical panel.
Why Permits Matter
Electrical permits help ensure:
- Safe installation
- Code compliance
- Proper grounding
- Correct breaker sizing
- Inspection approval
Skipping permits may create issues with:
- Home insurance
- Future home sales
- Failed inspections
Coordinate With the Utility Company
The utility company usually needs to disconnect power temporarily before the old panel can be removed safely.
Because the main service wires remain energized even when the breaker is off, this step is extremely important for safety.
Step 3: Turn Off Power and Verify the Panel Is Safe
Once utility power is disconnected, the next step is making sure all circuits are fully de-energized before touching any wiring.
Shut Off the Main Breaker
Turn the main breaker to the OFF position.
Test All Wires Carefully
Use:
- Voltage tester
- Multimeter
- Non-contact tester
to confirm there is no live electricity inside the panel.
Use Proper Safety Gear
Always wear:
- Insulated gloves
- Eye protection
- Rubber-soled footwear
Never assume wires are safe without testing them first.
Step 4: Label Every Existing Circuit
Before disconnecting any wires, label every circuit carefully. This makes reconnecting the new panel much easier later.
Label Common Circuits
Examples include:
- Kitchen outlets
- HVAC system
- Air conditioner
- Water heater
- Dryer
- Garage
- Bedrooms
- Lighting
- Bathrooms
Use masking tape or a label maker to identify each wire clearly.
Step 5: Remove the Old Breaker Box
After all circuits are labeled, the old electrical panel can be removed.
Disconnect Branch Circuit Wires
Loosen terminal screws and disconnect each branch wire carefully.
Remove Circuit Breakers
Pull breakers out one at a time from the old panel.
Disconnect Ground and Neutral Wires
Separate:
- Ground wires
- Neutral wires
to keep wiring organized.
Remove Main Service Wires
Disconnect the large service wires feeding the panel.
Unscrew and Remove the Panel Box
Once all wiring is disconnected, remove the old breaker box from the wall.
Older homes may also require:
- Meter upgrades
- Wiring repairs
- Grounding improvements
before the new panel can be installed.
Step 6: Install the New Electrical Panel
Now the new breaker box can be mounted securely.
Position the New Panel Correctly
The panel should be:
- Mounted level
- Easily accessible
- Securely attached to wall studs
- Installed at proper code height
Install Panel Components
Install:
- Main breaker
- Neutral bars
- Ground bars
- Cable connectors
- Surge protection devices
Modern breaker boxes are designed with better safety features than older electrical panels.
Step 7: Route and Organize the Wiring
After mounting the panel, route all wires neatly into the new breaker box.
Use Cable Clamps Properly
Secure wires using approved cable connectors and clamps.
Keep Wiring Organized
Neat wiring:
- Improves safety
- Prevents overheating
- Makes troubleshooting easier
- Helps inspections pass
Avoid overcrowding the panel with tangled wiring.
Step 8: Reconnect Circuit Wires
Once wiring is organized, reconnect each circuit carefully.
Connect Hot Wires to Breakers
Each hot wire connects to the correct breaker size based on the circuit load.
Connect Neutral Wires
Neutral wires attach to the neutral bus bar.
Connect Ground Wires
Ground wires connect to the grounding bar.
Match Breakers Properly
Breaker size must match:
- Wire gauge
- Circuit load
- Appliance requirements
Incorrect breaker sizing can create serious fire hazards.
Step 9: Install Safety Protection Devices
Modern electrical systems often include additional safety upgrades during panel replacement.
Install AFCI and GFCI Breakers
These breakers help protect against:
- Electrical fires
- Ground faults
- Arc faults
- Shock hazards
Add Whole-Home Surge Protection
Surge protection helps protect:
- HVAC systems
- TVs
- Refrigerators
- Computers
- Smart devices
This is especially useful in storm-prone areas like Dallas-Fort Worth.
Step 10: Balance Electrical Loads
Electrical loads should be balanced evenly across the panel.
Why Load Balancing Matters
Balanced loads help:
- Reduce breaker stress
- Improve voltage stability
- Prevent overheating
- Improve HVAC performance
- Reduce flickering lights
Large appliances should be distributed evenly across both sides of the panel.
Step 11: Test the Entire Electrical System
Before restoring power, test every connection and circuit carefully.
Perform Electrical Testing
Use a multimeter to verify:
- Proper voltage
- Correct breaker operation
- Ground continuity
- Circuit functionality
Check for Problems
Inspect for:
- Loose connections
- Hot spots
- Overloaded breakers
- Improper wiring
Every circuit should operate safely before power restoration.
Step 12: Restore Power and Inspect the Panel
Once testing is complete, utility power can be restored.
Turn On the Main Breaker
Restore power gradually and monitor the panel carefully.
Test Individual Circuits
Turn on breakers one at a time and confirm:
- Lights operate correctly
- Appliances function normally
- HVAC systems power up safely
- No breakers trip immediately
Monitor for Warning Signs
Watch for:
- Buzzing sounds
- Burning smells
- Flickering lights
- Warm breakers
If any of these occur, turn power off immediately and inspect the wiring.
Step 13: Label the New Breaker Box Clearly
After installation is complete, label every breaker clearly inside the panel door.
Include Accurate Circuit Names
Examples:
- Kitchen outlets
- Upstairs bedrooms
- AC condenser
- Furnace
- Water heater
- Garage outlets
Clear labeling makes future maintenance and emergency shutoffs much easier.
Common Mistakes To Avoid When Replacing an Electrical Panel
Installing an Undersized Panel
Future appliances and HVAC systems may overload the system.
Using Incorrect Breakers
Breakers must match manufacturer specifications and wire size requirements.
Poor Grounding
Improper grounding increases shock and fire risks.
Overcrowding Wires
Messy wiring increases overheating dangers.
Skipping Inspections
Uninspected electrical work can create safety and insurance issues.
Forgetting Surge Protection
Modern electronics and HVAC systems benefit greatly from surge protection.
How Long Does Electrical Panel Replacement Take?
Most residential electrical panel replacements take:
- 4 to 10 hours for standard upgrades
- 1 to 2 days for complex rewiring projects
Factors affecting timeline:
- Panel size
- Existing wiring condition
- Permit approvals
- Utility coordination
- Accessibility
- Weather conditions
Can You Replace an Electrical Panel Yourself?
Technically possible in some jurisdictions, but extremely dangerous and generally not recommended. DIY electrical panel replacement risks include:
- Electrocution
- Fire hazards
- Failed inspections
- Insurance issues
- Code violations
- Incorrect grounding
- Improper breaker sizing
In Texas, electrical work involving service panels should be handled by licensed electricians like Astar DFW.
Book Professional Electrical Panel Installation with Astar DFW
When it comes to electrical panel replacement, safety, precision, and code compliance matter. Astar DFW provides professional electrical panel installation services in Dallas-Fort Worth with licensed and experienced electricians who handle everything from breaker box upgrades to full electrical system improvements.
Their team specializes in safe panel replacements, surge protection, rewiring, and modern electrical upgrades designed for today’s HVAC systems and high-power appliances. Serving homeowners throughout Dallas, Plano, Frisco, Irving, Arlington, and the surrounding DFW areas.
Contact:
- Website:https://astardfw.com/
- Email: contact@astardfw.com
- Serving Dallas-Fort Worth, TX
Final Thoughts on Replacing an Electrical Panel
Replacing an electrical panel is one of the most important safety and performance upgrades a homeowner can make. Whether your home has an outdated fuse box, overloaded breaker panel, or insufficient amperage for modern appliances, upgrading your electrical service improves safety, reliability, efficiency, and long-term property value.
If you notice tripping breakers, flickering lights, burning smells, or electrical limitations in your home, it may be time for a professional inspection.
For homeowners across Dallas-Fort Worth, working with experienced electricians like the team at Astar DFW ensures your breaker box upgrade is performed safely, professionally, and in full compliance with modern electrical code standards.