
Voltage drop testing is one of the most critical diagnostic procedures in electrical troubleshooting, yet it’s often misunderstood or skipped by non-professionals. In real-world electrical systems, even small voltage losses can lead to overheated wires, failing appliances, tripping breakers, and hidden safety risks.
This guide explains exactly what is a voltage drop test , how a voltage drop test works, why it matters, and how licensed electricians use it to diagnose problems accurately and safely in residential and commercial systems.
You will also learn when to call a licensed electrician like Astar DFW for expert electrical diagnostics and repair.
What Is a Voltage Drop Test and Why Does It Matter?
A voltage drop test is a diagnostic electrical procedure used to measure how much electrical voltage is lost as current flows through a circuit. Every electrical wire has some resistance, and when electricity flows through it, a small portion of voltage is naturally lost. However, excessive voltage drop indicates a problem such as undersized wiring, loose connections, corrosion, overloaded circuits, or failing components.
In simple terms, voltage drop testing helps electricians determine whether electrical energy is being delivered efficiently and safely to appliances, outlets, motors, or electrical panels.
In professional electrical work across Dallas–Fort Worth, companies like Astar DFW use voltage drop testing as part of advanced troubleshooting in residential homes, commercial buildings, HVAC systems, and industrial electrical installations.
Understanding Voltage Drop in Electrical Systems
Voltage drop occurs due to resistance in electrical conductors. According to Ohm’s Law, voltage decreases when current flows through resistance.
- Higher current = higher voltage drop
- Longer wire runs = higher voltage drop
- Smaller wire gauge = higher voltage drop
Why Does Voltage Drop Happen?
Voltage drop occurs when electrical energy is lost as it travels through a circuit due to resistance and system conditions. In practical electrical systems, this is a normal phenomenon, but it becomes a problem when the drop is excessive and affects performance or safety. The main reasons voltage drop happens include:
- Wire resistance (natural property of copper/aluminum)
- Loose or corroded electrical connections
- Overloaded circuits are drawing too much current
- Long-distance wiring runs (common in large homes in Dallas suburbs)
- Faulty breakers, switches, or terminals
Acceptable Voltage Drop (NEC Guidelines)
The National Electrical Code (NEC) provides recommended limits:
- 3% voltage drop for branch circuits
- 5% total system voltage drop (feeder + branch combined)
Why this matters:
When the voltage drop exceeds these limits:
- Efficiency decreases
- Heat increases in the wiring
- Fire risk increases
- Equipment failure becomes more likely
Professional electricians in Dallas–Fort Worth strictly follow these standards during installations and diagnostics, especially in high-load environments like HVAC systems, EV chargers, and commercial machinery.
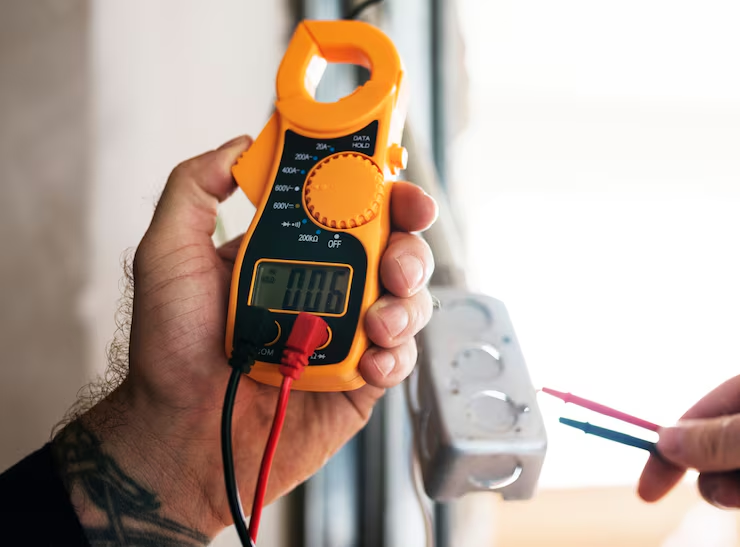
Tools Required for a Voltage Drop Test
A voltage drop test requires specialized electrical tools to ensure accurate measurements, safe handling, and reliable diagnosis of circuit performance issues. Professional electricians always use calibrated instruments to evaluate voltage loss under real operating conditions.
-
Digital Multimeter (True RMS Recommended)
Used to measure voltage at the source and load points with high accuracy. True RMS models are preferred because they provide correct readings even in fluctuating electrical loads.
-
Clamp Meter (Current Measurement Tool)
Measures current flow in a live circuit without disconnecting wires. This helps determine how the electrical load is affecting the voltage drop across the system.
-
Circuit Load (Operational Appliance or Equipment)
A voltage drop test must be performed while the circuit is active and under load. Common examples include running HVAC units, appliances, or lighting systems.
-
Electrical Schematics (Wiring Diagrams)
Essential for commercial and complex systems, schematics help trace circuits and identify potential problem areas quickly and accurately.
-
Insulated Test Probes
Provide safe contact points when measuring live circuits, ensuring accurate readings while reducing risk of electrical shock.
-
Safety Gloves and PPE (Personal Protective Equipment)
Includes insulated gloves, safety glasses, and protective gear to prevent electrical hazards during live testing.
-
Power Quality Analyzers (Advanced Tools Used by Professionals like Astar DFW)
Used to analyze voltage stability, harmonics, and overall electrical performance in complex systems.
-
Infrared Thermal Imaging Cameras
Detect heat buildup in wires, breakers, and connections, helping identify hidden resistance points causing voltage drop.
-
Smart Diagnostic Testing Devices
Advanced tools that provide real-time system monitoring, data logging, and deeper analysis of electrical performance issues.
How to Perform a Voltage Drop Test? Step-by-Step
A voltage drop test is a practical way to find hidden electrical issues inside a circuit. It helps you understand whether power is being delivered efficiently from the electrical panel to the device. Below is a clear, easy-to-follow process used by licensed electricians, explained in a way that is simple to learn and apply.
Step 1: Turn On the Circuit Under Load
Before starting the test, ensure the circuit is actively running under a normal electrical load. This means electricity must be flowing through connected devices so real operating conditions can be measured accurately. Without load, voltage readings will not reflect actual system performance or hidden electrical issues.
This step is very important because voltage drop only happens when electricity is flowing.
Examples of proper load conditions:
- Air conditioner running
- Refrigerator operating
- Water pump or motor running
- Lights and multiple outlets in use
Why this matters: If there is no load, there is no current flow, and you will not get an accurate voltage drop reading. The test becomes meaningless.
Step 2: Measure the Source Voltage (At the Panel)
Now measure the voltage at the beginning of the circuit, usually at the electrical panel or breaker. This reading represents the full available supply before electricity travels through wiring. Use a digital multimeter carefully, ensuring proper contact with terminals for an accurate and stable baseline reference reading.
What to do:
- Place probes on the hot and neutral terminals
- Record the reading (example: 120.6V)
This is your reference voltage, the starting point before electricity travels through the wire.
Step 3: Measure Voltage at the Load Point
Next, measure voltage at the endpoint where the electricity is actually being used, such as an outlet or appliance connection. Keep the device running during measurement to ensure real-world operating conditions. Record this value carefully because it reflects how much voltage reaches the equipment.
Possible load points:
- Wall outlet
- Appliance connection point
- Motor or HVAC unit terminals
What to do:
- Measure the voltage at the load while the device is running
- Example reading: 114.2V
This shows how much voltage actually reaches the equipment.
Step 4: Calculate the Voltage Drop
Now, find out how much voltage was lost in the circuit. Once both readings are taken, subtract the load voltage from the source voltage to find the voltage drop. This calculation shows exactly how much electrical energy is lost while traveling through the wiring system. Even small losses can indicate early signs of inefficiency or electrical stress.
Formula:
Voltage Drop = Source Voltage – Load Voltage
Example:
- 120.6V – 114.2V = 6.4V drop
This number tells you how much power is being lost while traveling through the wiring.
Step 5: Calculate Percentage Voltage Drop
Now convert the voltage loss into a percentage to understand its severity in relation to the total supply voltage. This is done by dividing the voltage drop by the source voltage and multiplying by 100. Percentage values help determine whether the system is operating within safe electrical limits.
Formula:
(Voltage Drop ÷ Source Voltage) × 100
Example:
- (6.4 ÷ 120.6) × 100 = 5.3%
Interpretation:
- Ideal: 0–3% (normal and safe)
- Warning: 3–5% (needs attention)
- High: 5%+ (problem exists)
In this example, 5.3% is too high, meaning the circuit has an inefficiency or fault.
Step 6: Inspect the Circuit for Problems
If the voltage drop is higher than acceptable limits, the next step is to inspect the entire circuit for faults. This includes checking wire size, connection tightness, breaker condition, and signs of corrosion or overheating. Each component must be examined carefully to locate resistance points.
Check for:
- Undersized wire (too small for the load)
- Loose electrical connections (outlets, switches, panels)
- Corrosion or rust on terminals
- Overloaded circuit (too many devices running)
- Damaged or worn-out breaker
- Poor or aging wiring
This step helps you find the real cause, not just the symptom.
Voltage Drop Testing in Dallas–Fort Worth Homes
In Dallas–Fort Worth, voltage drop issues are more common due to increasing electrical demand, long wiring distances, and aging infrastructure. These local conditions make proper testing and diagnosis essential for maintaining safe and efficient electrical systems.
Key reasons voltage drop is common in Dallas–Fort Worth:
- High HVAC usage during extreme heat
Air conditioners run for long hours in Texas summers, drawing heavy electrical load. This increases current flow and often leads to noticeable voltage drop, especially during peak afternoon temperatures. - Large suburban homes with long wiring runs
Many homes in Dallas suburbs have extended layouts, meaning electricity must travel longer distances from the panel. Longer wiring increases resistance, which naturally results in higher voltage loss. - Aging electrical systems in older neighborhoods
Older homes often have outdated wiring, worn connections, and aging breaker panels. These conditions increase resistance and can cause inconsistent voltage delivery across circuits. - Increased electrical load from EV chargers and smart homes
Modern technology like EV chargers, smart appliances, and automation systems significantly increases household power demand, exposing weak or overloaded circuits.
When Should You Call a Professional Electrician?
You should contact a licensed electrician when you start noticing signs that your electrical system is not performing normally. These warning signs often indicate voltage drop issues or deeper wiring problems that should not be ignored. If your lights flicker when appliances turn on, breakers trip frequently, or your appliances run weaker than usual, it usually means the circuit is struggling to deliver stable power. Similarly, outlets that feel warm, a burning smell near wiring, or consistently high voltage drop readings above 5% are all serious indicators that require immediate attention.
For homeowners and businesses in Dallas–Fort Worth, scheduling a professional inspection with Astar DFW ensures accurate diagnosis, safe repairs, and code-compliant electrical solutions. Their licensed electricians use advanced testing methods to detect voltage drop issues early and restore safe, efficient electrical performance across your property.
FAQS:
What is a normal voltage drop in a home circuit?
A normal voltage drop in residential circuits is typically around 2–3%. Anything above 5% is considered excessive and should be inspected. High voltage drop may indicate wiring issues or overloaded circuits needing professional evaluation from Astar DFW.
How do electricians find voltage drop problems?
Electricians measure voltage at both the source and load while the circuit is operating. They compare readings to identify loss. Professionals like Astar DFW use advanced tools for accurate diagnostics and fault detection.
Can a bad outlet cause voltage drop?
Yes, a damaged, loose, or corroded outlet can increase resistance and cause voltage drop. This leads to inefficient power delivery. Certified electricians such as Astar DFW can inspect and repair faulty outlets safely.
Is voltage drop dangerous?
Yes, excessive voltage drop can cause overheating, equipment damage, and even electrical fire risks. It should never be ignored. Professional inspection from Astar DFW ensures safe identification and correction of the issue.
Why does my AC unit have voltage drop issues?
Air conditioners draw high electrical current, making them highly sensitive to voltage loss. Undersized wiring or connection issues often contribute. Experts like Astar DFW can diagnose HVAC-related electrical inefficiencies.
Who should I call for voltage drop testing in Dallas?
You should always contact a licensed electrician for accurate testing and repairs. In Dallas–Fort Worth, trusted professionals like Astar DFW provide reliable voltage drop testing and complete electrical diagnostics.